Learn How To Knit With Easy Beginner Step-by-Step Guide

As a beginner in knitting, you’re probably curious about the basics in knitting before you take lessons. Knitting provides a hobby that’s fun, requires self-discipline and steadfastness, and allows you to feel a sense of achievement when your knitting project is complete.
A completed fabric that has been knitted is characterized by rows of stitches that resemble loops and flat rows alternated.
Why Learn How to Knit?
Knitting has been around for thousands of years, and probably always will be. So, why knit by hand when you can easily buy finished fabrics in the marketplace? There are many reasons to learn how to knit and to also teach your daughter to knit.
One, knitting gives you a sense of accomplishment. When you complete a beautiful knitted piece that can be framed as a home decor piece, you’ll be proud to hang it on your wall. When you complete a lovely, warm sweater made with your own hands, you can proudly wear it and explain that you knitted it yourself.
Two, learning how to knit requires self-discipline and steadfastness. You must work on it consistently to complete a project. Your child can also learn to set goals, stick with something until the end, and accomplish something special through knitting.
Three, knitted items make excellent gifts. When your friend or loved one becomes an expectant mother, you can immediately begin knitting a blanket for the baby. Or, knit slippers for your family members as Christmas gifts. Giving something you knitted with your own hands makes a very special gift from the heart.
How to Knit: A Beginner's Step-by-Step Guide
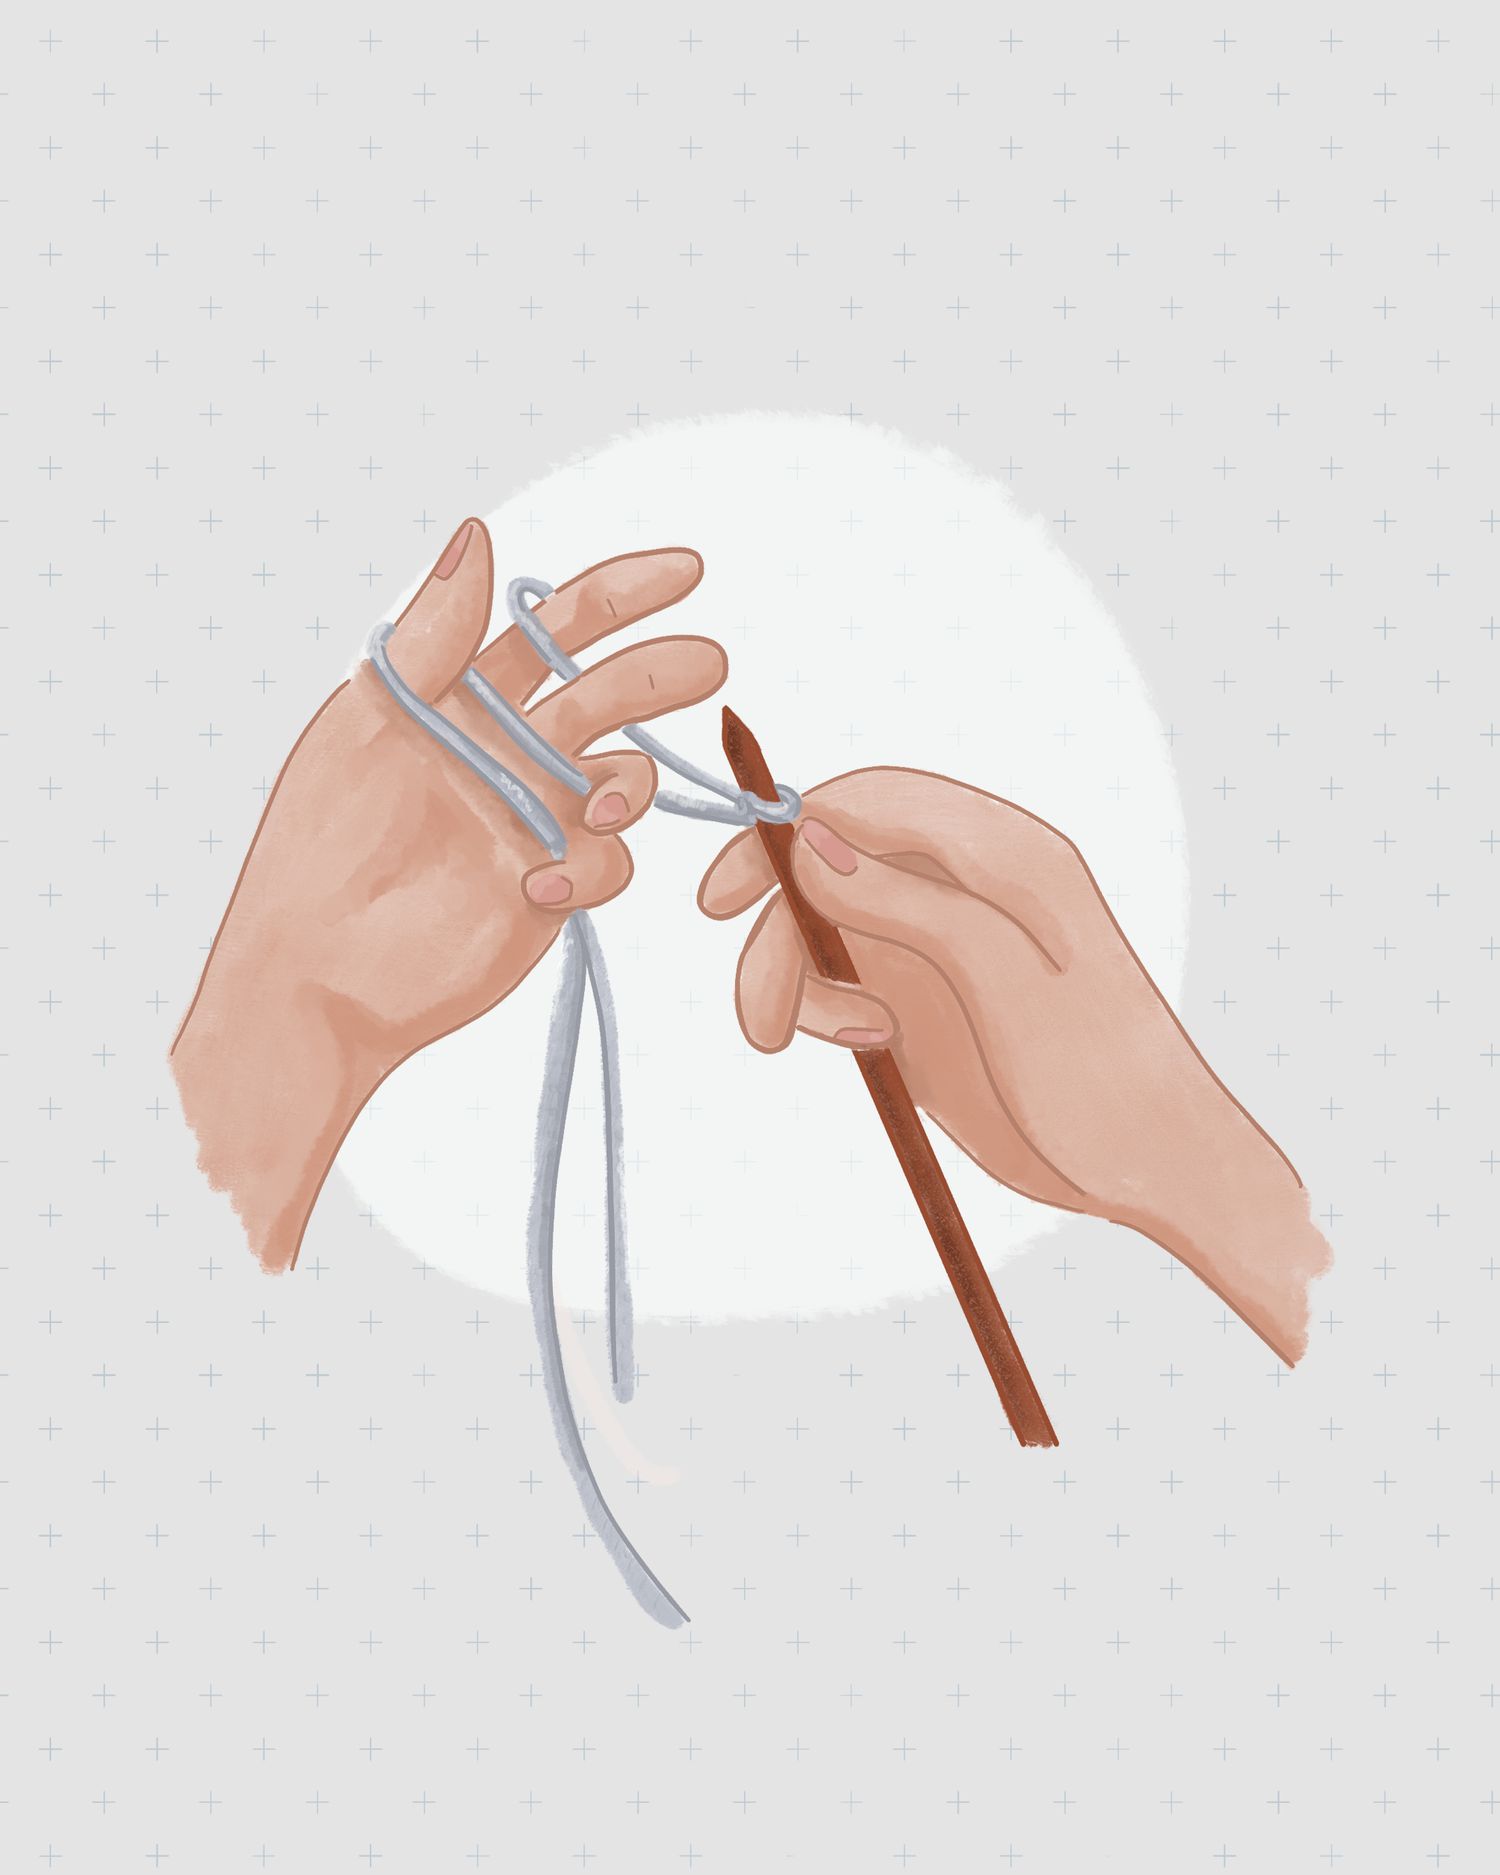
How to Tie a Slip Knot
 | |
|
Make a slip knot by looping the yarn into a pretzel shape, leaving a tail end at least three times the width of what you are knitting (for instance, if your scarf is 8 inches wide, you'll need a 24-inch-long tail). Slip the knitting needle through pretzel shape as shown, and pull the yarn ends to tighten.
↚
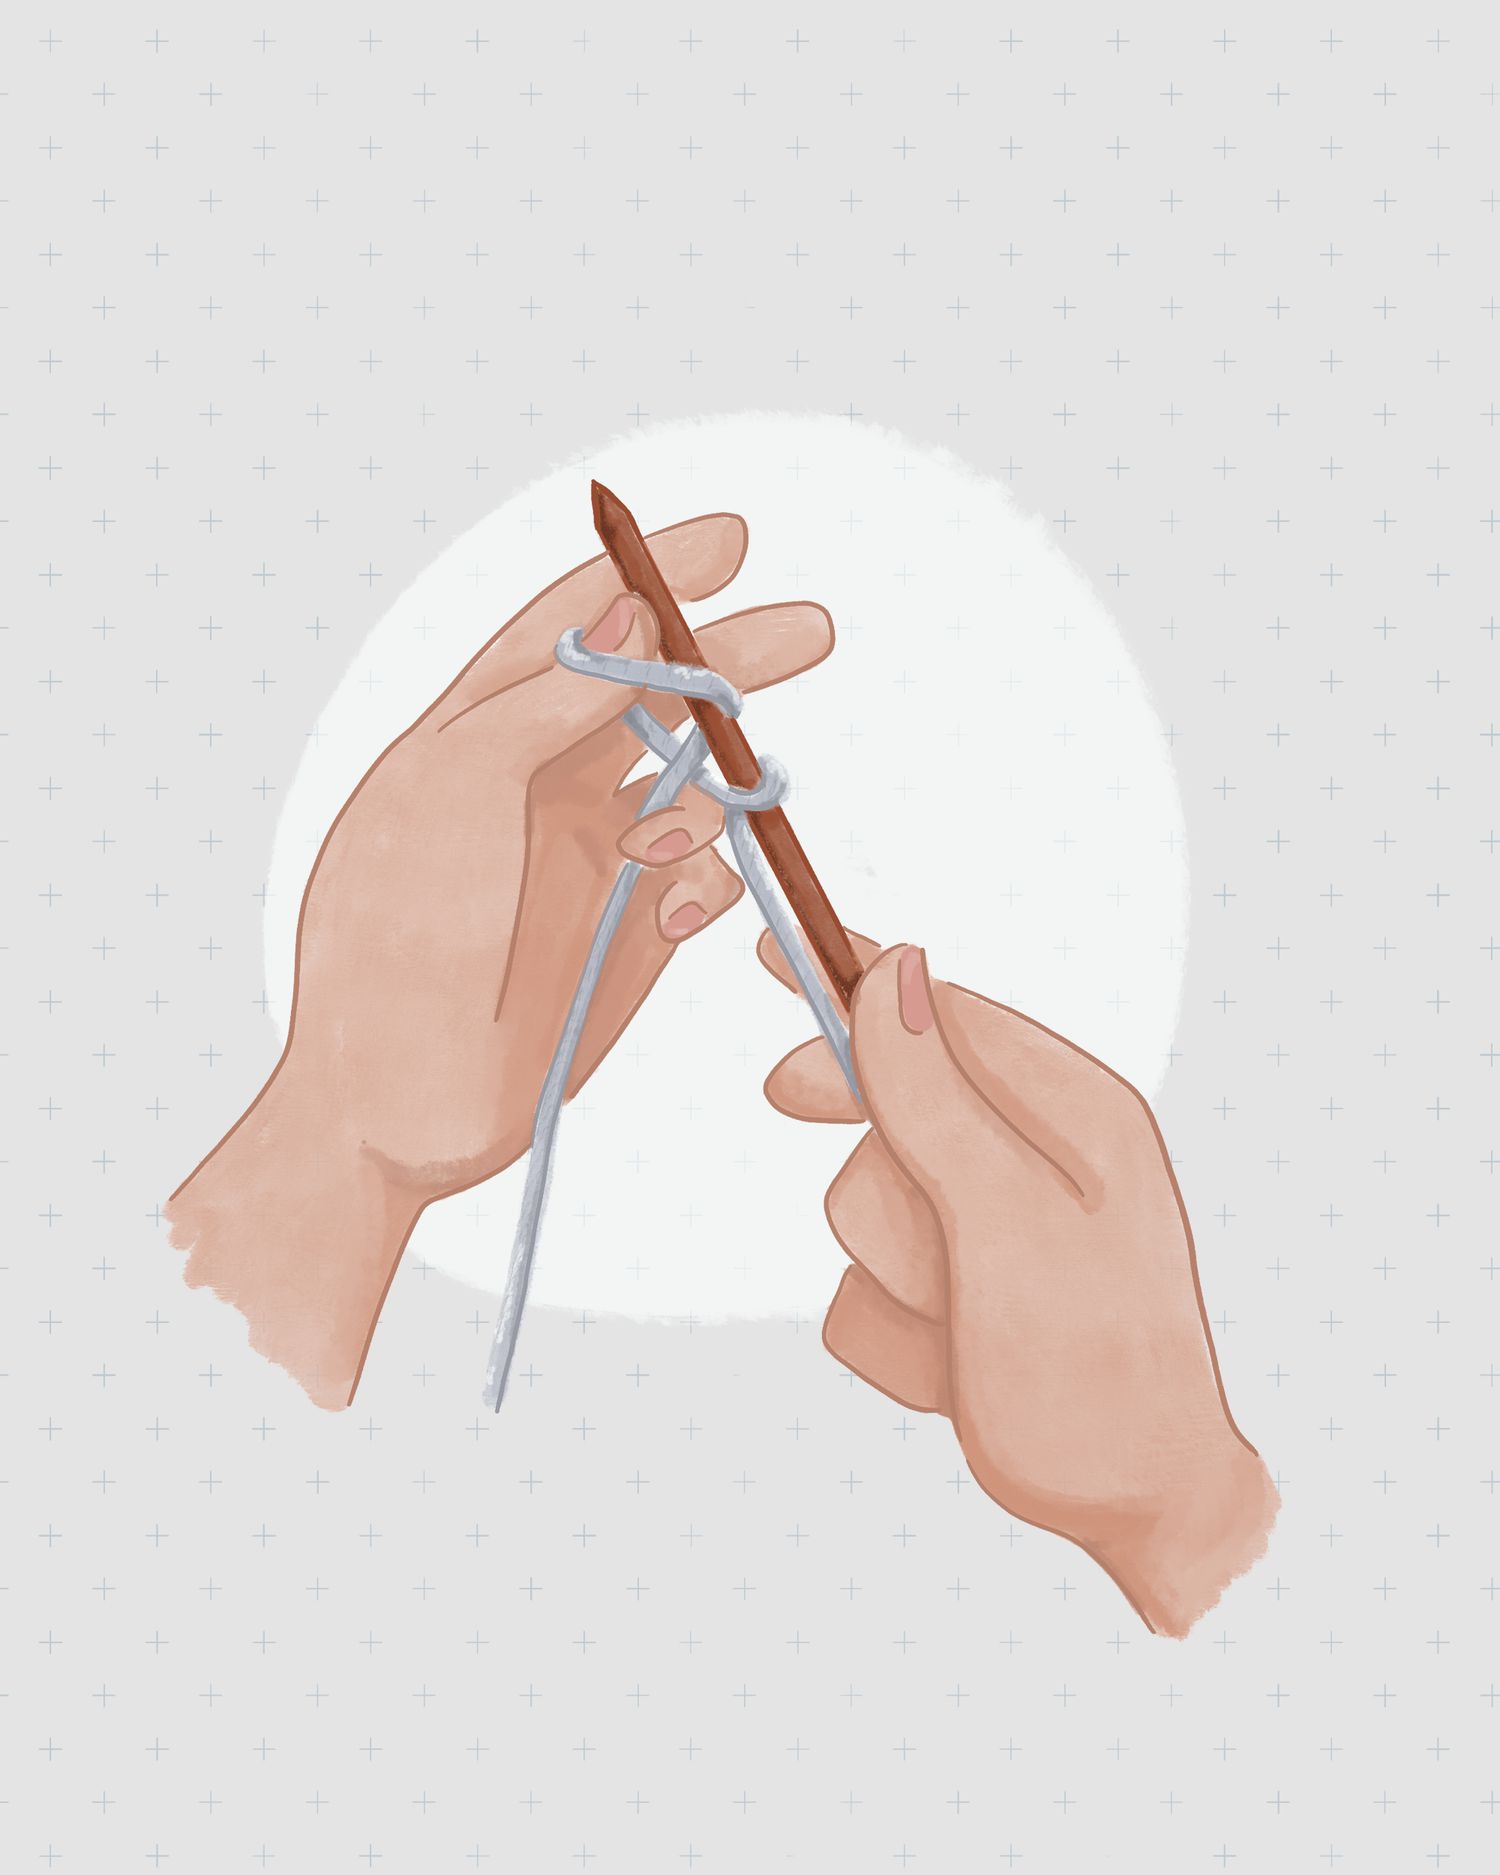
How to Cast On
 | |
|
To begin knitting, you will need to create a foundation row of stitches on your needle by "casting on." Drape the tail of yarn over your left thumb and the working yarn (ball end) over your left index finger. Use your other fingers to catch yarn lengths in left palm. Insert the needle upward through the loop on your thumb.
↚
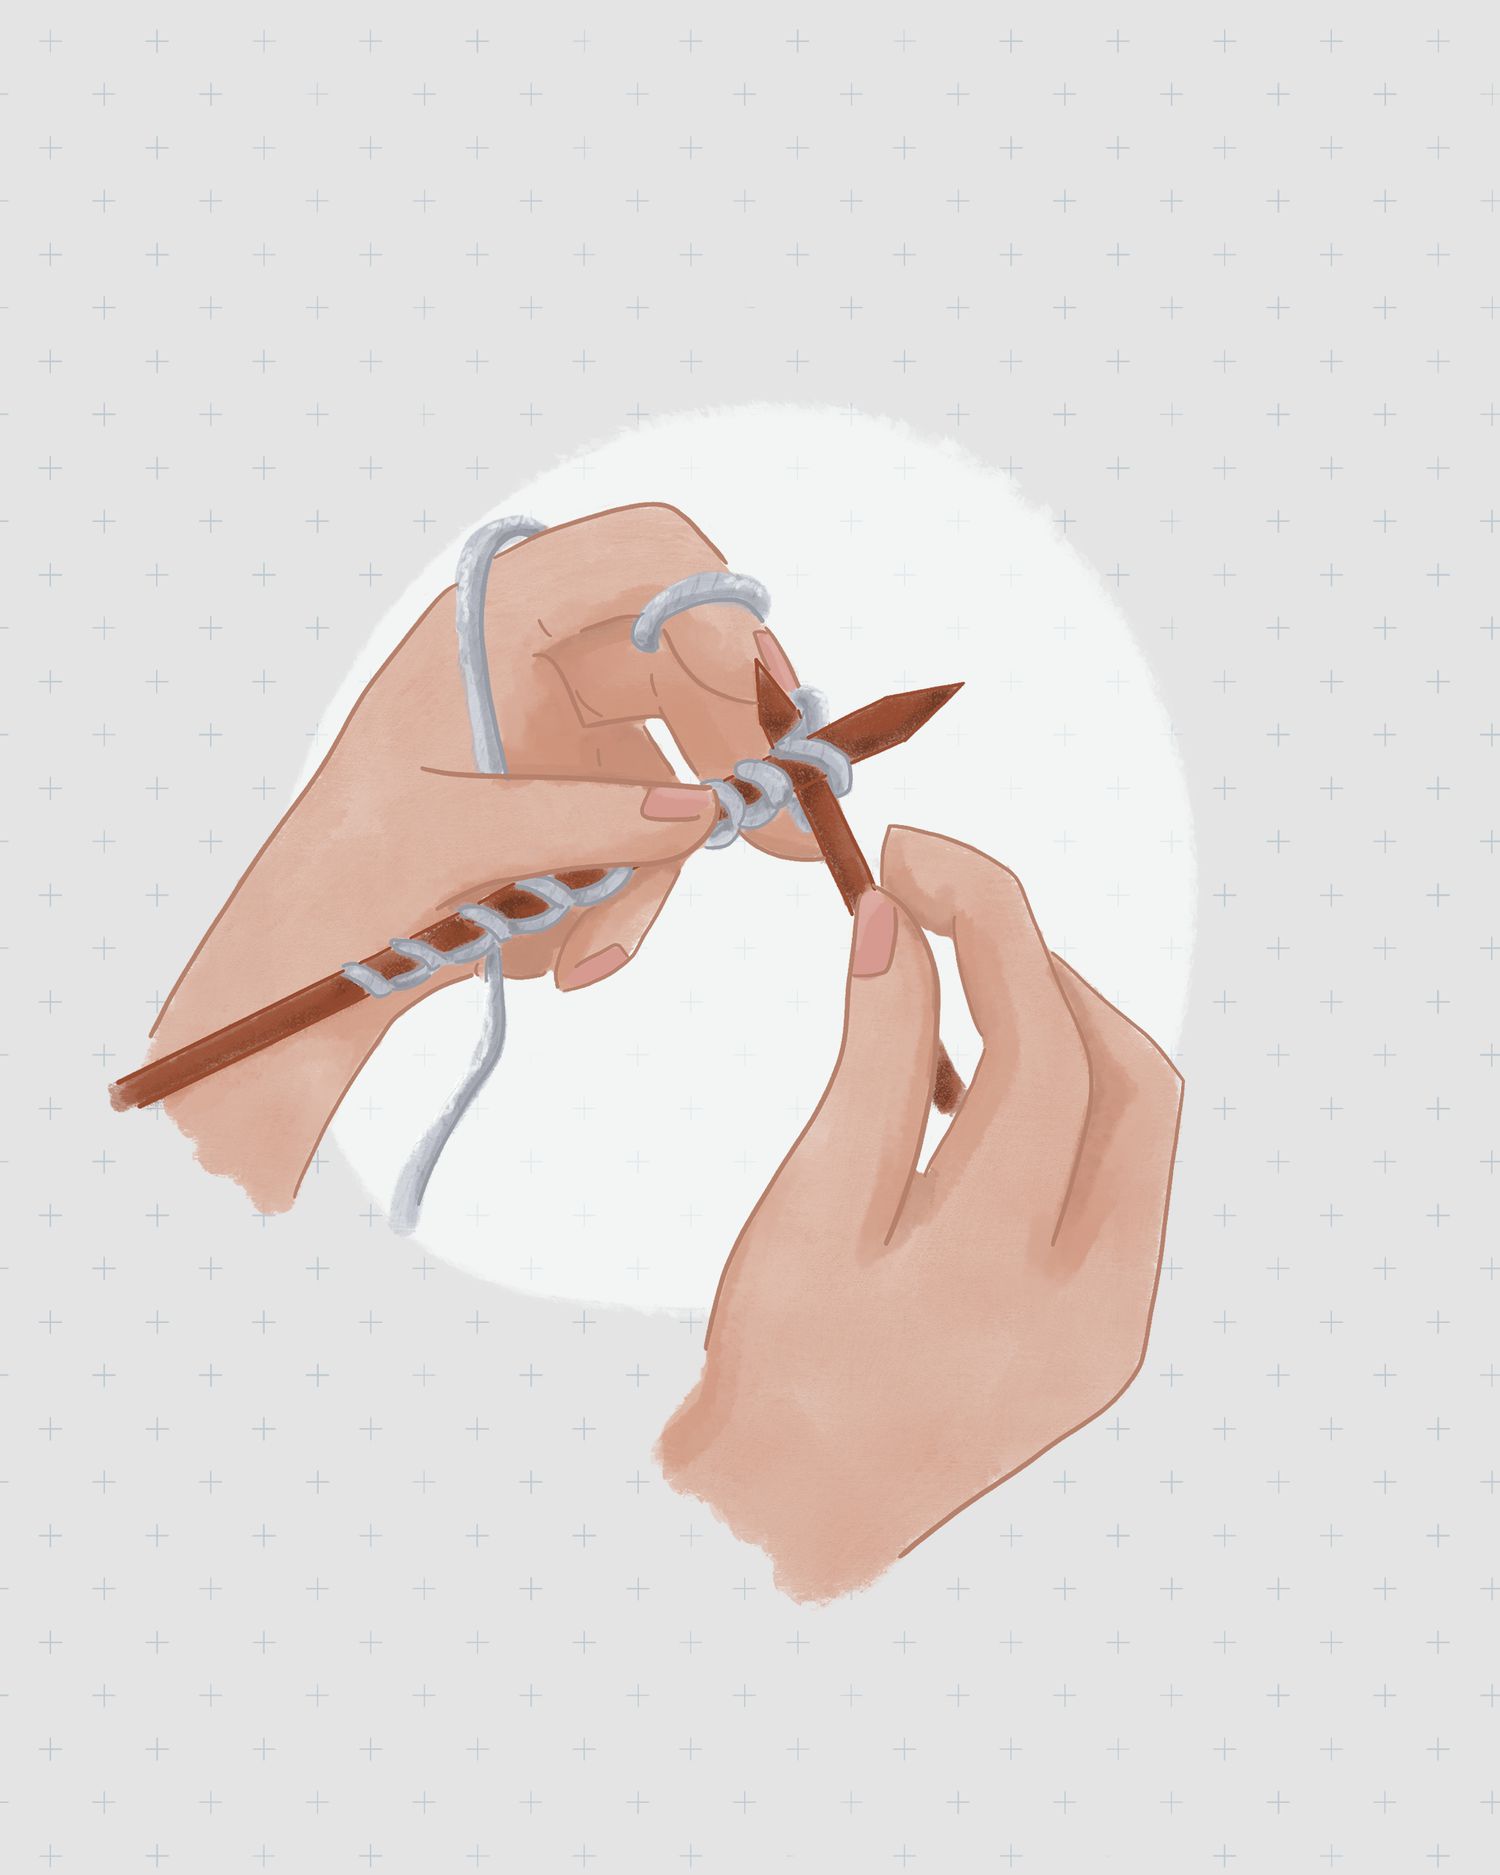
How to Cast On
 |
| Credit: Amanda Mustard Illustrations |
With the needle, catch the working yarn that's on your index finger, and pull it through the loop on your thumb. Remove your thumb from the loop. Keeping yarn ends secured in your palm, reposition thumb, and tighten a new stitch on right-hand needle. Repeat these steps until you've cast on the required number of stitches.
How to Knit
 |
| Credit: Amanda Mustard Illustrations |
Hold the needle with cast-on stitches in your left hand. Wrap the working yarn around your left index finger, and hold it in back of the left needle. Insert point of right needle from front to back into the first cast-on stitch on the left needle, opening up a stitch.
↚
How to Knit
 |
| Credit: Amanda Mustard Illustrations |
Catch the working yarn with the right needle. Pull the yarn through the opened stitch. Slip cast-on stitch off the left needle while holding your middle finger against the second cast-on stitch to ensure it does not also slip off. The stitch on the right needle is the newly formed knit stitch. Continue knitting across the cast-on row. When you have emptied the last stitch from the left needle (completing a row), exchange needles, returning the needle with stitching to your left hand.
↚
How to Purl
 |
| Credit: Amanda Mustard Illustrations |
The purl stitch differs from the knit stitch in two fundamental ways: The working yarn is held in the front of the project instead of the back, and the needle is inserted from the back to the front instead of from front to back. Hold the needle with cast-on stitches in your left hand. Wrap the working yarn (ball end) around your left index finger, and hold it in front of the work. Insert the point of the right needle, from back to front, into the first cast-on stitch on the left needle, opening up a stitch.
↚
How to Purl
 |
| Credit: Amanda Mustard Illustrations |
Lay the working yarn over the needle from front to back by moving left index finger downward. Push the working yarn from front to back through cast-on stitch. Slip the cast-on stitch off left needle while holding your middle finger against the second cast-on stitch to ensure it does not also slip off. The stitch on the right needle is the newly formed purl stitch. As a purl stitch faces you, it looks like a grain of rice; its reverse side looks like a V.
↚
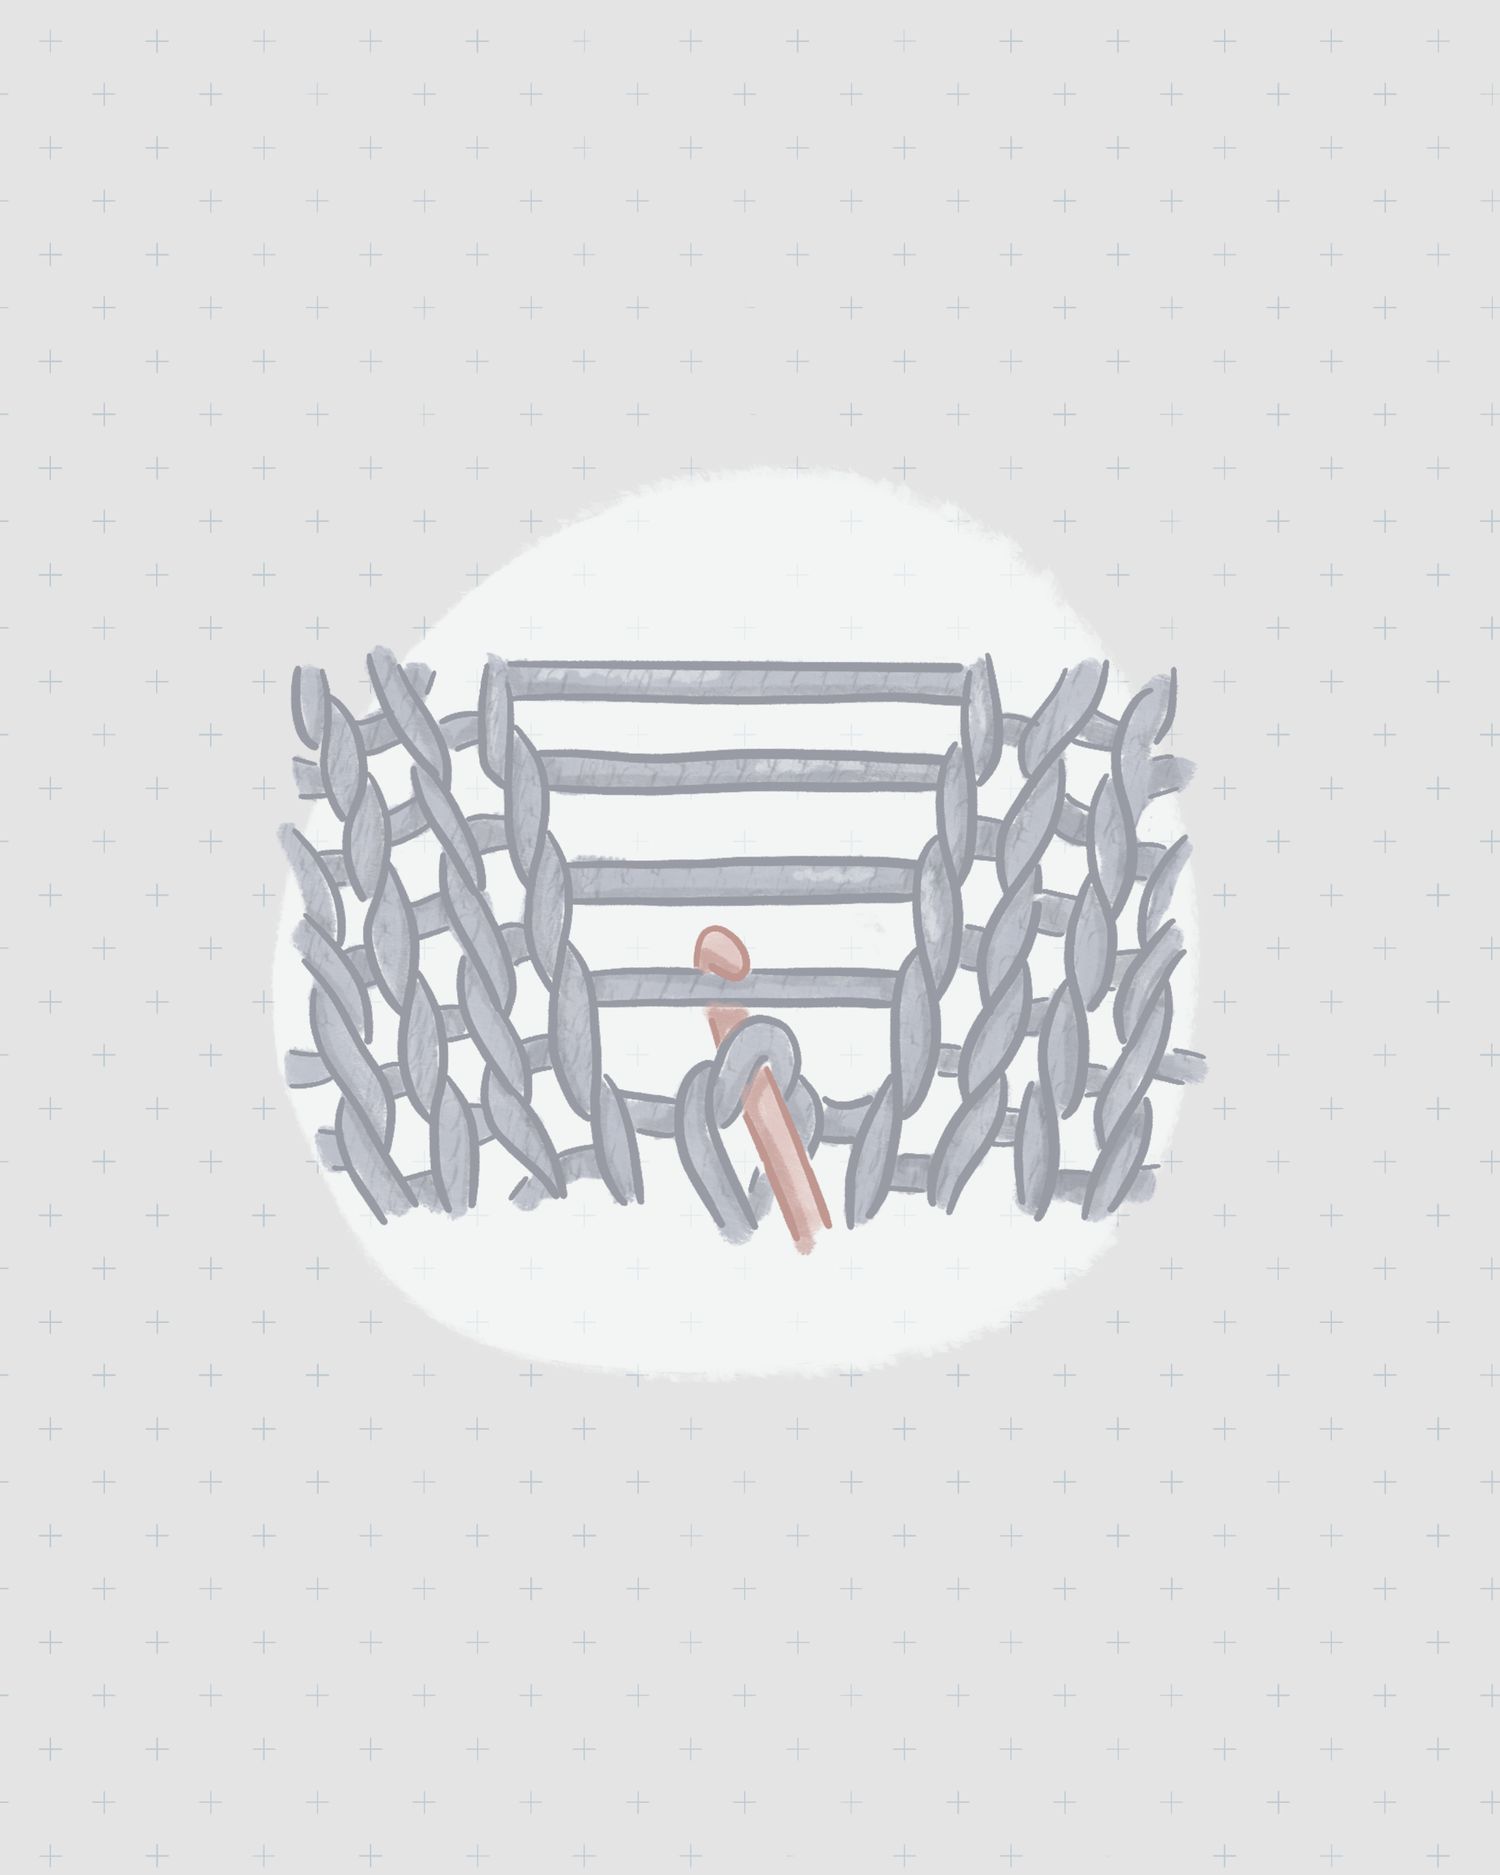
How to Pick Up a Dropped Stitch
 |
| Credit: Amanda Mustard Illustrations |
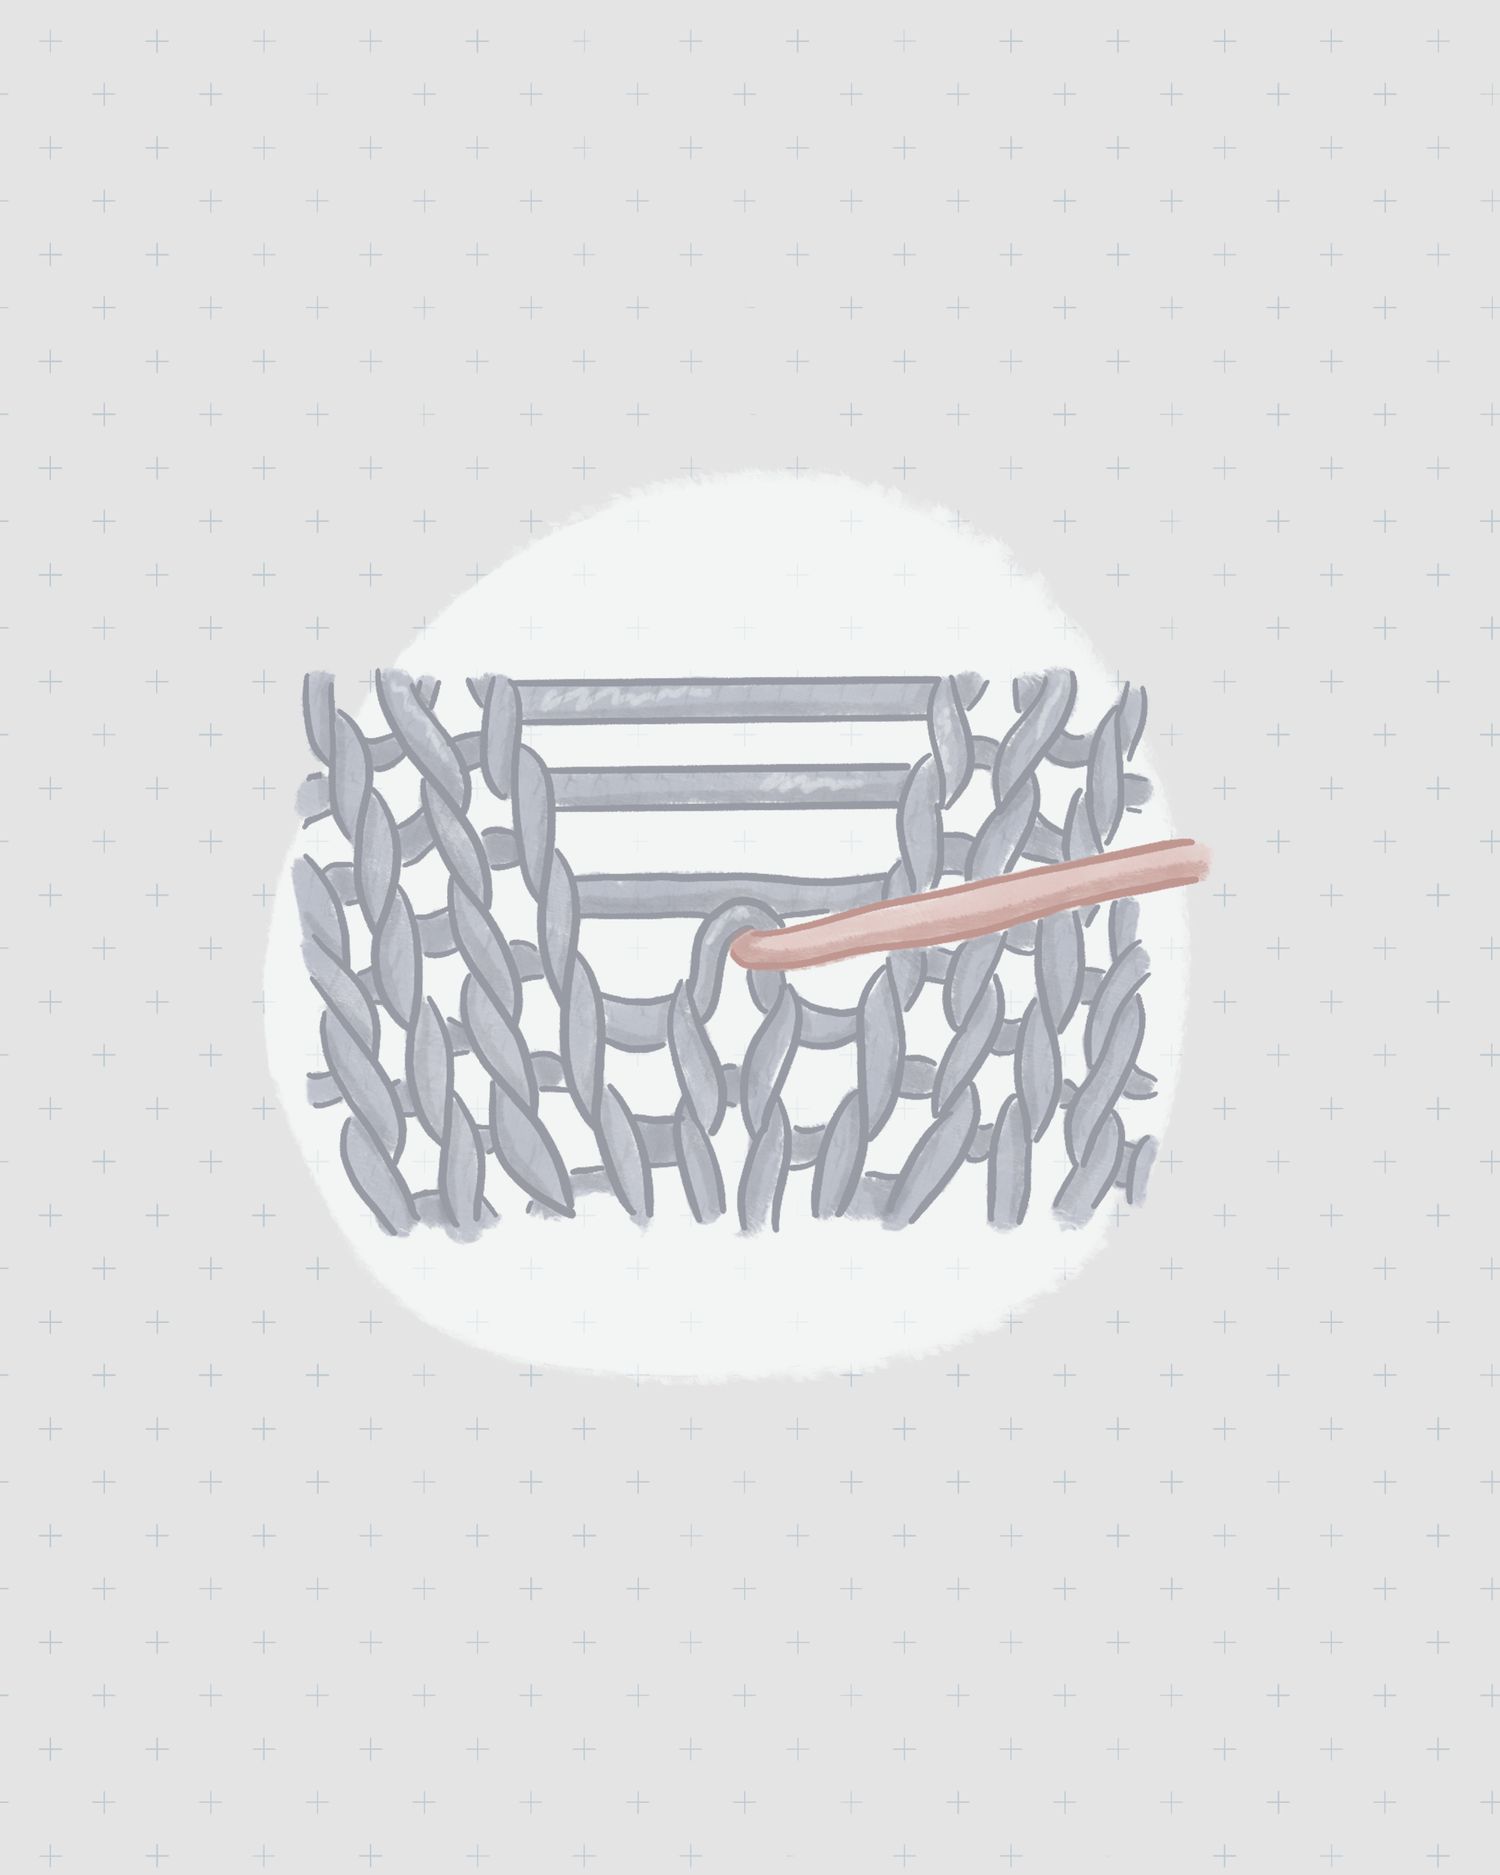
If you drop a stitch while knitting, don't panic; it's simple to retrieve it with a crochet hook. With the knit side facing you, insert the crochet hook, front to back, into the loop of the dropped stitch.
↚
How to Pick Up a Dropped Stitch
 |
| Credit: Amanda Mustard Illustrations |
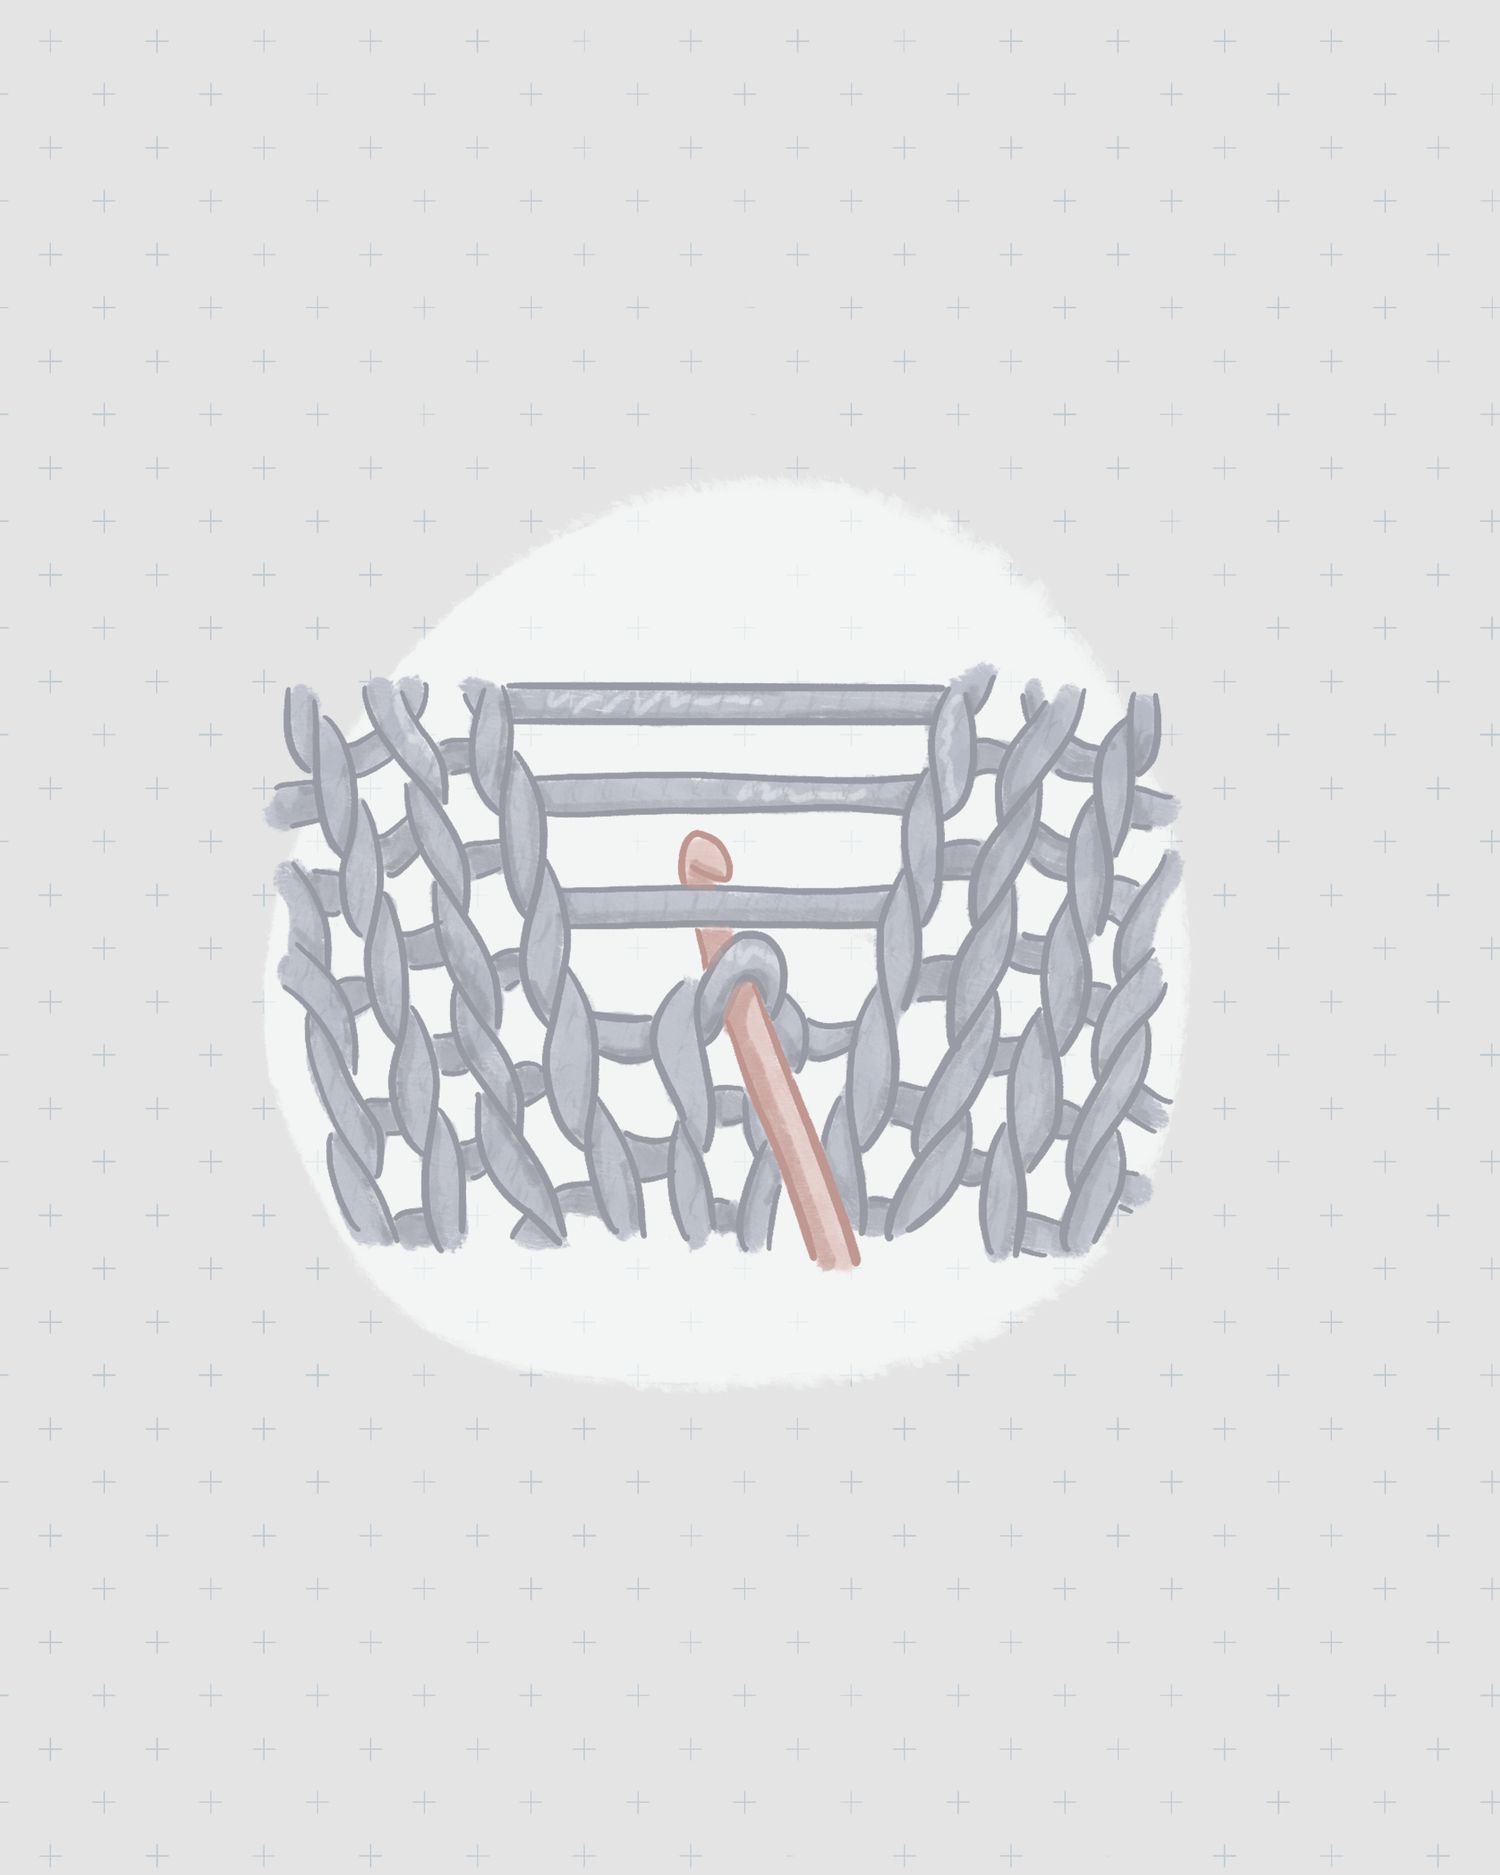
Use the hook to catch the first horizontal "ladder," and pull it through the loop to the front.
↚
How to Pick Up a Dropped Stitch
 |
| Credit: Amanda Mustard Illustrations |
Repeat until all ladders have been pulled through loop. Place the stitch back onto left-hand needle, with the right side of the loop on the front of the needle. To pick up a stitch dropped on a purl row, turn your work around, and follow the directions for picking up a dropped knit stitch.
↚
How to Cast Off
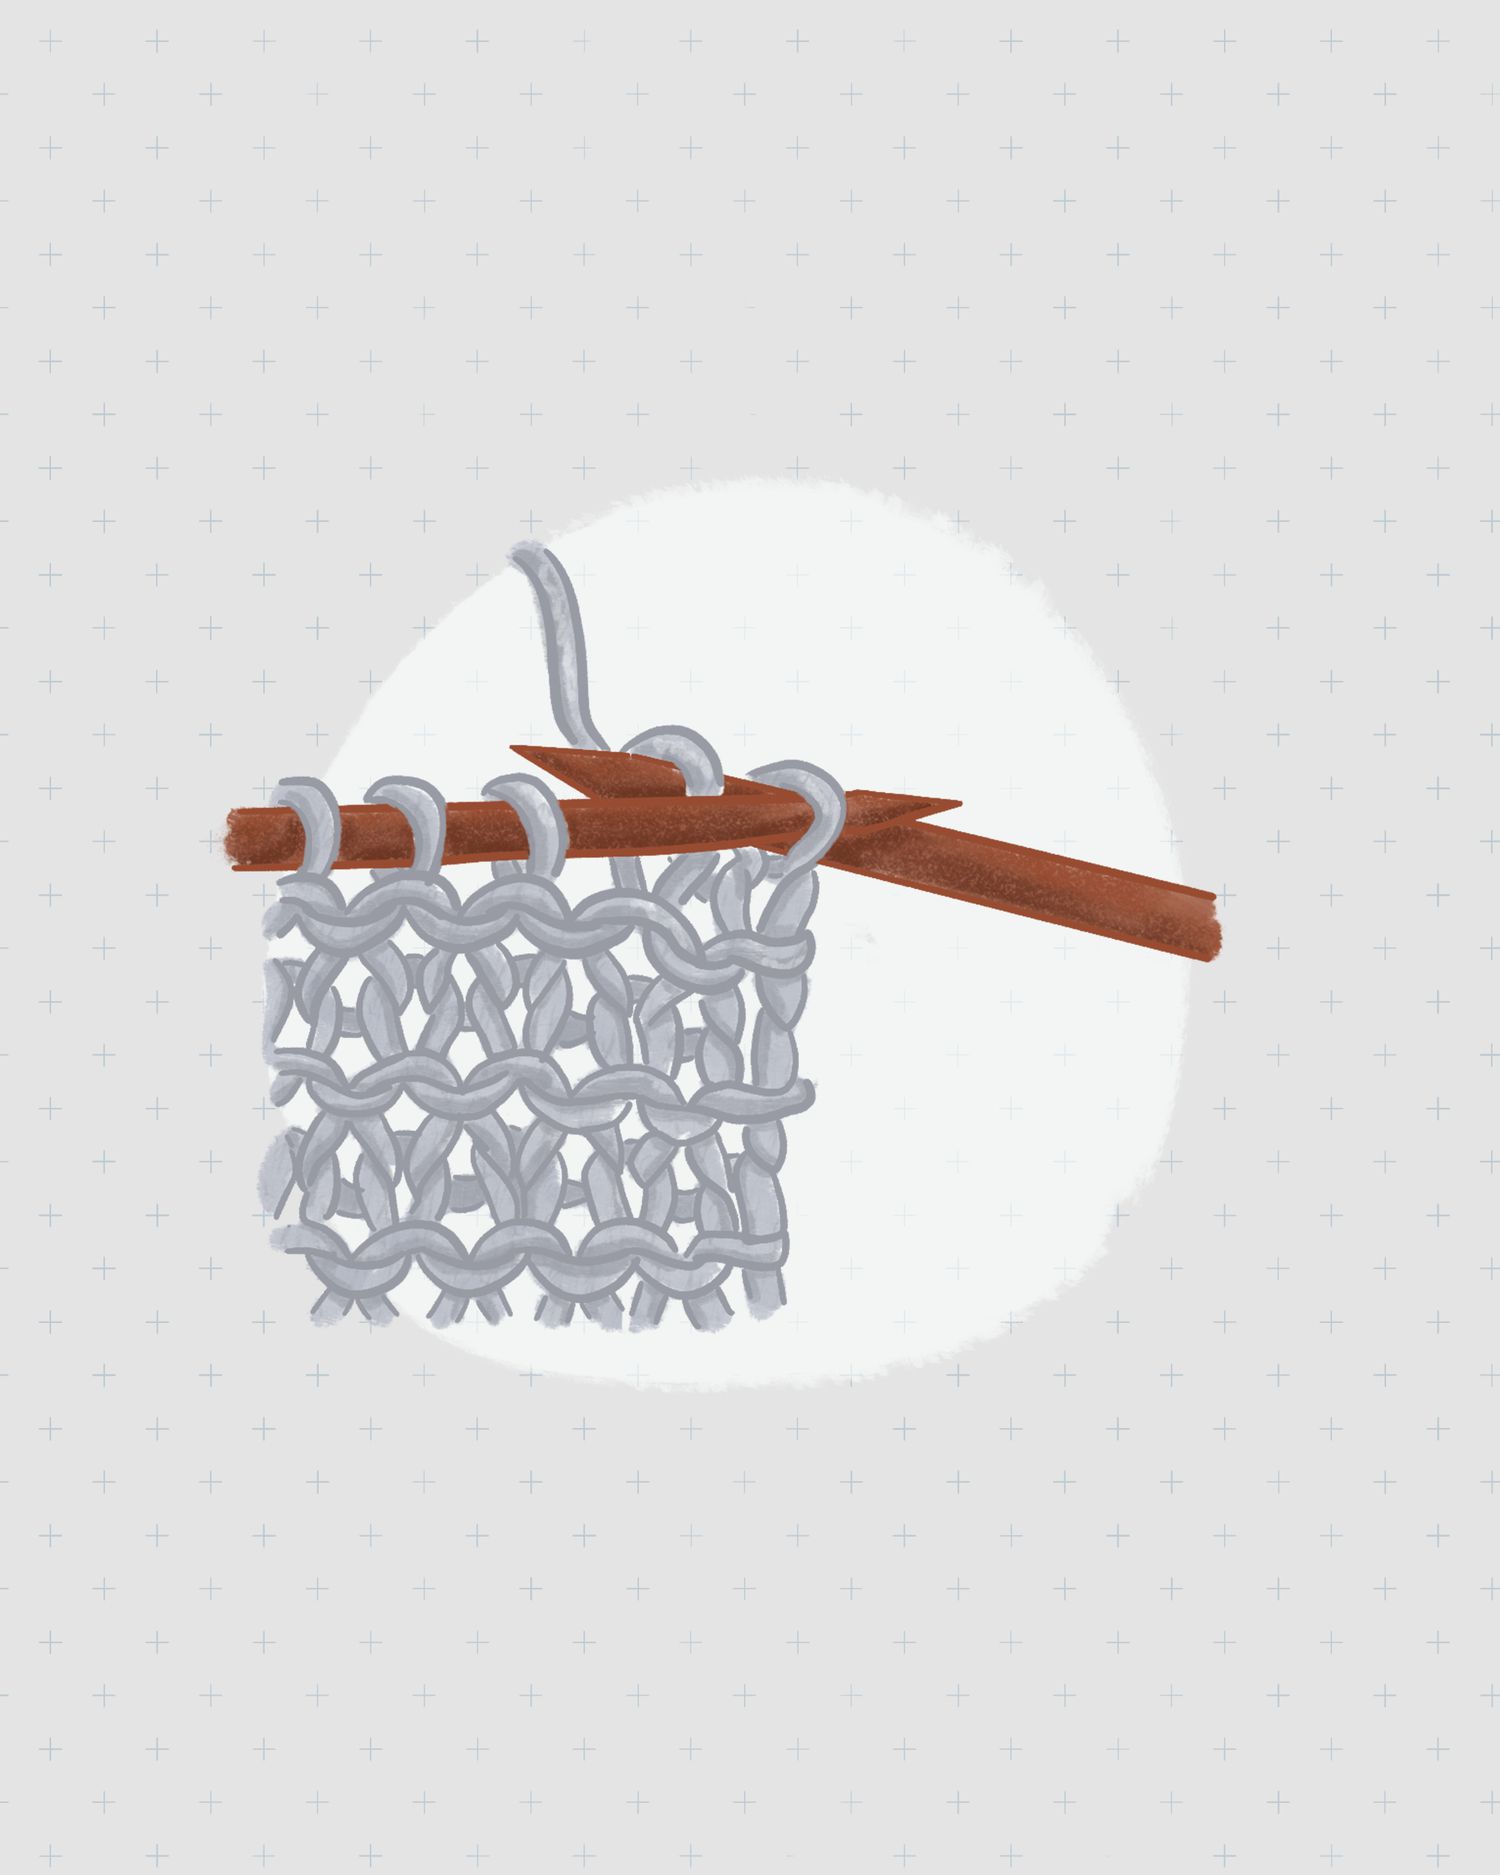 |
| Credit: Amanda Mustard Illustrations |
These necessary steps keep stitches from unraveling once they're removed from the needle. Knit two stitches. Insert left needle into the first stitch; lift this stitch up over second stitch and off the needle.
↚
How to Cast Off
 |
| Credit: Amanda Mustard Illustrations |
Continue knitting stitches in this manner until all stitches have been cast off. Cut the working yarn, leaving a 6-inch-long tail. Pull the tail through the last stitch to secure.
↚
How to Cast Off
 |
| Credit: Amanda Mustard Illustrations |
Use a yarn needle to weave tail ends of yarn through backs of several stitches, picking up only surface loops.


